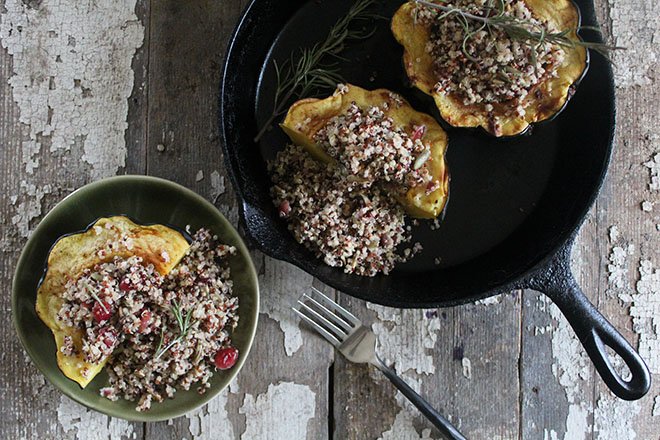
Citrus Quinoa Pilaf Stuffed Acorn Squash is the perfect dish for the holiday table because of it’s beautiful presentation, but it’s also great to make anytime of year for one or two! You can easily cater this dish to your needs and add in or replace something you may not be too keen on, but there’s one ingredient you can’t skimp on, sumac!
QUINOA
- 1 cup quinoa (multi colored)
- 1½ cups filtered water (may add additional if needed to cook the quinoa)
- juice of 1 lemon
- ½ heaping teaspoon ground sumac
- ½ teaspoon ground cinnamon
- 1 tablespoon olive oil
- ½ cup pumpkin seeds
- ¼ cup dried cranberries
- ½ tablespoon zest of lemon
- ½ teaspoon fresh rosemary
- ½ teaspoon parsley
ACORN SQUASH
- 1 large acorn squash
- 2 teaspoons coconut oil
- sea salt and black pepper to taste
- ACORN SQUASH //
- Preheat oven to 350 degrees F
- Cut acorn squash in half, scoop the seeds out of the center creating a “bowl”
- Add 1 teaspoon of coconut oil into each center of the two halves of the squash.
- Sprinkle with sea salt and black pepper
- Bake for 30-45 minutes or until soft.
- QUINOA //
- Rinse thoroughly until water is clear.
- Bring water to a boil and add quinoa, cook for 20 minutes (you may need to add additional water in as needed).
- You’ll know when the quinoa is done when it’s fluffy and the sprout “tails” come out.
- Fluff with a fork until light and fluffy.
- In a large bowl, combine quinoa with all remaining ingredients (spices, olive oil, seeds, cranberries, lemon, etc.).
- ASSEMBLY //
- Stuff the acorn squash with the quinoa and pack in until each acorn squash halve is full (you will have leftover quinoa- I serve this on the side).
- Drizzle the top of the stuffed acorn squash with olive oil (just a bit!) and top with fresh sprig of rosemary.
- Bake again for 10 minutes or until the top of the quinoa is a bit crisp and golden brown.
- Serve with additional quinoa on the side.
- Enjoy!